PowerPoint Slide
PowerPoint is by far the most popular presentation app, and it’s easy to see why. There are many themes, layouts, and tools inside PowerPoint that help you build professional presentations quickly.
Not everyone has PowerPoint installed on their device, though. When you want to share your PowerPoint file on YouTube or with a colleague who doesn’t have PowerPoint, it’s a great idea to convert PowerPoint presentations into video files.
PowerPoint can export a video file that can be played in common apps like QuickTime, Windows Media Player, and VLC. Best of all, the exported video includes the same animations and transitions.
You can export a PowerPoint file directly from PowerPoint—with no other tools or apps needed. Let’s learn how.
Want to present live on camera? You’ll need a video conferencing setup with great lighting, the right camera, and other equipment. Check out our free course to learn how to achieve that:
Why Make Your PowerPoint Into a Video ?
PowerPoint isn’t marketed as a video tool. There are many advanced video tools out there like Adobe Premiere or Final Cut Pro X. With all of these options, you might be wondering why you would use PowerPoint to create a video file.
Here are four great reasons to use PowerPoint to create video presentations:
-
The device you want to show your PowerPoint file on doesn’t support PowerPoint files (think Smart TV’s or handheld game consoles).
-
You already have a finished PowerPoint presentation and don’t have the time to recreate it from scratch in a video editor.
-
Your recipient doesn’t have PowerPoint installed on their device, but can open it in a standard video player app.
-
You don’t have the time to learn a new piece of video editing software to create a presentation video.
How to Quickly Convert Your PowerPoint to Video (Watch & Learn)
Let’s walk through how to convert a PowerPoint (PPT) file into a video. In the quick, two minute screencast below, you can watch me cover the process step-by-step:
Keep scrolling to see more tips for making videos with PowerPoint, including compression tips that weren’t mentioned in the video.
How to Export Your PowerPoint to Video Start off by opening your PowerPoint presentation. Exporting a PowerPoint presentation to a video file should be the last step of your process. This is because you’ll need to convert the PowerPoint presentation to video each time you make changes.
As I mentioned earlier, PowerPoint will export animations and transitions when you export the file as a video.
To begin the export, go to the File > Export > Create a Video menu option.
From this menu, there are several key settings to choose before you export your finished video. The dropdown boxes on the right side control the quality and timing of your presentation.
Here are the key choices you’ll need to make before converting your PowerPoint to video:
1. Set PowerPoint Video Quality
Choose a quality setting from the dropdown to find the sweet spot between file size and video quality.
The better the quality setting you choose, the larger the finished file will be. If you’re going to upload the video online to a service like YouTube, it’s fine to export at the highest quality and let them handle the compression.
If you’re sharing this video with a colleague via email or posting it on your own server, a smaller file size might be the right choice. Here are my recommendations for when to use each of the settings:
- Presentation Quality. When keeping the file size small is no object, use Presentation Quality. It will render a video that looks extremely close to your original presentation alongside a large file.
- Internet Quality. This is ideal if you want to upload quickly to a social service like Facebook or Twitter. Using Internet Quality is a good middle ground between file size and clarity.
- Low Quality. This is the right choice when you’re trying to save space, such as when you’ll attach a video to an email.
Choose a quality setting from the dropdown option to make your selection.
2. Control PowerPoint Slide Timings
Now, you need to set timings, the runtime for each slide in your video. There are two options for timings on the dropdown menu:
-
Don’t use Recorded Timings and Narrations. Simply set a length of time for each slide to show in the video, such as 5 seconds each.
-
Use Recorded Timings and Narrations. Setup specific lengths of time for each slide to show, and optionally record narrations for the video version. Basically, these two options let you choose between setting specific timings or using the same runtime for each slide.
For this example, let’s leave the option set to Don’t Use Recorded Timings and Narrations.
When you choose this option, you’ll need to set the Seconds spent on each slide option. This is how long each slide will show in the video version. The default is 5 seconds as you can see in the screenshot above.
3. Create Your PowerPoint Video
Finally, click on Create Video. PowerPoint will open up a Save As window, and you’ll need to set a folder and filename for your finished video. You can also choose between an MPEG-4 video (.MP4 file) or Windows Media Video (.WMV) file when exporting, so choose the appropriate format if your device has any limitations. I typically leave this set to MP4.
How to Record Timings in PowerPoint
In the example above, we used the same amount of time spent on each slide (a flat 5 seconds in the example shown.) However, you can setup timings and narrations for your slide to customize how long each slide should show.
To setup timings and narrations, choose Record Timings and Narrations from the timings dropdown.
Then, a dropdown menu will appear. There are two options here:
- Slide and animation timings. Leave this box checked to record the amount of time
- Narrations, ink, and laser pointer. Leave this box checked if you want to record audio from your computer’s default microphone.
Voiceovers are very helpful if you want to send a slide deck to a colleague and share your commentary while they watch the video. Once you press Start Recording, PowerPoint will go into a fullscreen view of your presentation. Leave each slide on screen for the length of time it should show in the video.
Basically, PowerPoint is recording a live version of your presentation. If you leave a slide on a screen for 10 seconds, it will appear for 10 seconds in the video version. You can use the arrow keys to advance the slides and change slides. When you reach the end of the presentation, PowerPoint will exit to the menu. Now, you can save your finished video presentation with your own timings and narrations. The finished video will use the same timings you used while rehearsing.
Recap and Keep Learning More Slide
Maybe you’re converting your PowerPoint presentation to go online, or maybe you’re trying to make it easy for a co-worker that doesn’t have PowerPoint installed. Either way, there are plenty of reasons to convert a PowerPoint file to a video for easy watching.
Software that easily converts PowerPoint presentations to videos is a useful tool for anyone who wants to share their files on social media, blogs, or video sharing sites. Converting your PowerPoint presentation to video before posting will protect your presentation from modification and repackaging by someone else. It will also allow you to play it on a wide array of video supporting devices like Smart TVs, tablets, and smartphones.
But, if you’d like to convert your presentation to video, that doesn’t necessarily mean you need to look to third-party software. Beginning with version 2010, Microsoft PowerPoint itself can do just that. Here are the steps you need to follow to convert your PowerPoint slides into video format. How to Convert PowerPoint Slides (PPT) to MP4 Video
1. Open the PowerPoint presentation you’d like to convert.
2. Click on File.
3. The next step will differ based on which version of PowerPoint you’re using. Click on
- Save & Send, in PowerPoint 2010.
- Export, in version 2013 and above.
- Save as Movie, if using PowerPoint for Mac. 4. Select Create a Video in Windows or Save as Movie in the Mac OS.
5. Proceed to the conversion process and wait for the output video to be created.
Top Ten PowerPoint to Video Converters
It’s great to have this feature included in PowerPoint itself, but we experienced that the timings of slide transitions in a video converted this way may be off. So, if you find yourself in a situation like this, or if you use PowerPoint 2007, which doesn’t support conversion to video, here are the top ten PowerPoint to video converters:
1. iSpring River
Windows, Shareware $97/year
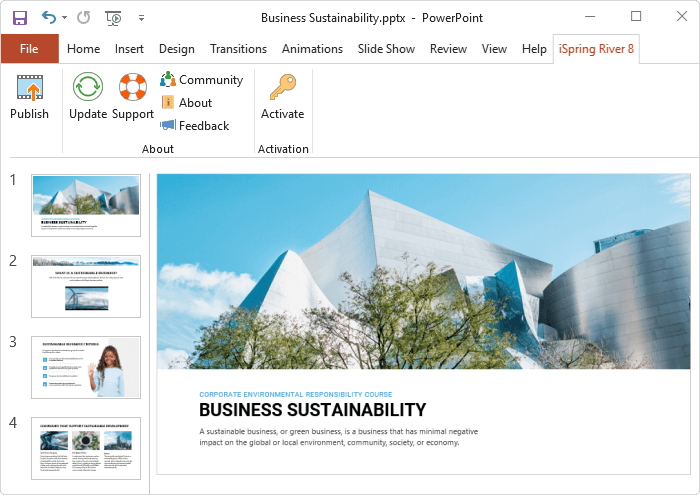
iSpring River integrates with PowerPoint and allows you to convert your slideshows to MP4 format and upload them directly to YouTube in a single click. It can help teachers and trainers in the education and corporate sectors to turn even the most complex PowerPoint presentations into crystal-clear 1080p HD format. The video file the tool creates is compatible with Windows, Mac, and Android operating systems.
2. PowerVideoPoint Lite
Windows, Freeware

The Free PPT to Video Converter by Digital Office Pro will convert your PowerPoint presentation file to WMV, MOV, MKV, and ASF formats. Video files are compatible with most mobile devices, including Apple and Android smartphones.
3. RZ PowerPoint Converter
Windows, Shareware
$39.99 for a lifetime license
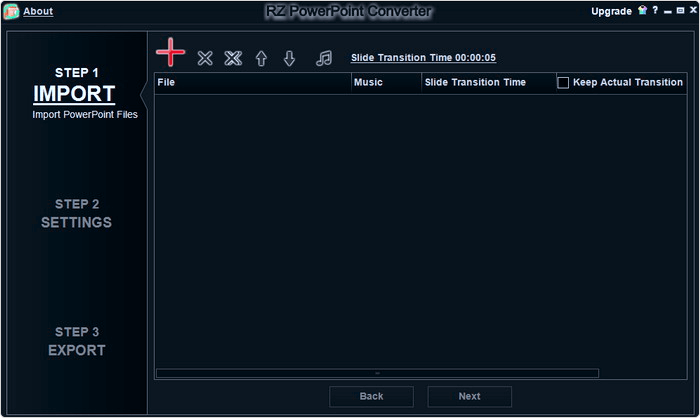
RZ Soft is a PowerPoint to video converter that supports all versions of PowerPoint (going back to 2003) and all PowerPoint formats. The software adjusts the final output size and resolution to user specifications.
4. Leawo
Windows, Shareware
$44.95 for a lifetime license
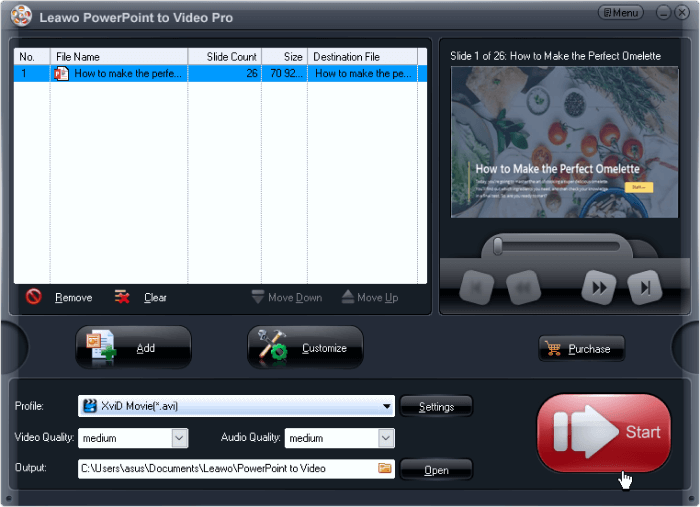
Free to try, Leawo PowerPoint Converter will convert your PowerPoint slideshow into popular video formats. A dated graphical interface can be accepted as a trade-off for an ability to batch convert presentations.
5. Online Convert
Online, Freeware
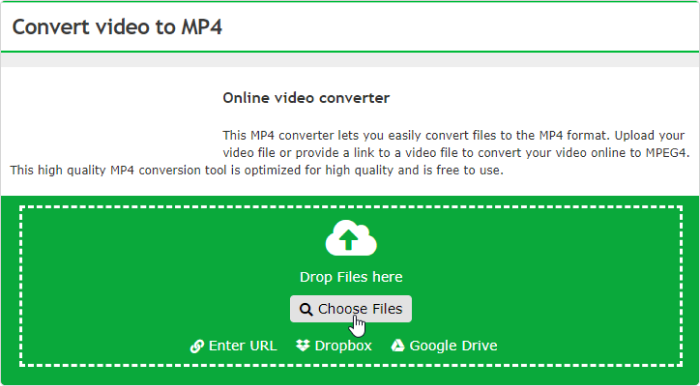
Online Convert is a free web service that converts your PowerPoint to multiple video formats and allows you to download the final video to your computer. The site also offers a number of other useful file converters, all free, and with no watermark in the final output file.
6. ImTOO Convert PowerPoint to Video Free
Windows, Freeware
$29.95 for a lifetime license
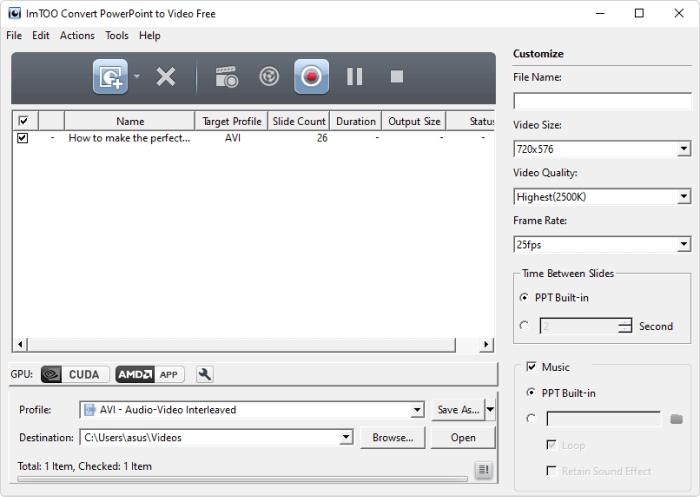
The ImToo converter boasts the ability to convert your PowerPoint files to video without the need to have PowerPoint installed on your computer. This software also enables you to add commentaries, watermarks, and music to your PowerPoint before converting it.
7. Xilisoft
Windows, Shareware
$49.95 for a lifetime license
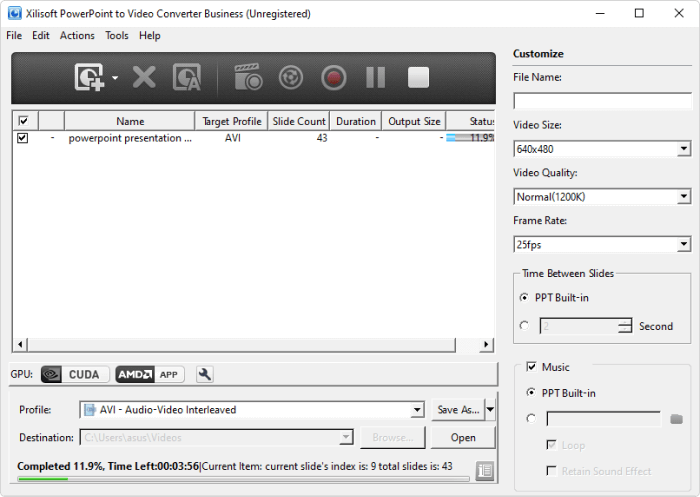
Xilisoft PowerPoint to MP4 Converter is a doppelganger of the ImTOO converter with a slightly more limited functionality in the free version. It allows you to convert PowerPoint presentations to a number of popular video formats, including full high-definition (HD) quality. This software provides a number of tools to help you customize and tweak your presentation prior to conversion.
- Moyea PPT to Video Converter Windows, Shareware $49.95 for a lifetime license
Moyea PPT to Video Converter Like Leawo, MoyeaSoft PowerPoint to Video Converter can convert your PowerPoint slideshow to a variety of popular video formats, preserving all the effects in the original file. Video files are compatible with most tablets, portable media players, video game consoles, and mobile phones.
9. E.M. PowerPoint Video Converter Pro
Windows, Shareware
$45.95 for a lifetime license
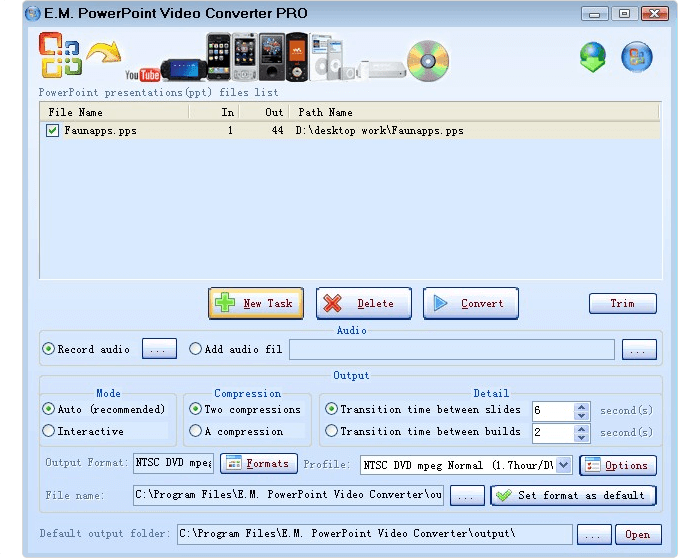
ETinySoft PowerPoint Video Converter claims to be an all-in-one PowerPoint to video converter, capable of converting files to almost all popular video formats. The site provides a number of tutorial videos to help users get started.
10. VeryPDF
Windows, Shareware
$19.95 for a single personal user license
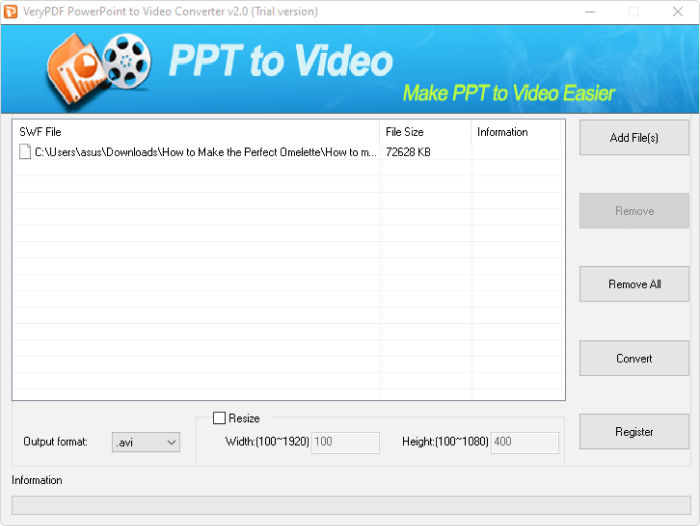
The converter by VeryPDF will convert your PowerPoint presentation to a number of video formats and is compatible with most versions of Windows, including Vista and XP.
Conclusion
There are many features to compare when considering the right PowerPoint conversion software. Quality of output, support of PowerPoint effects, compatibility with modern devices, and one-click publishing are all important factors to take into consideration. If you need a reliable PowerPoint to video converter that does the job no matter how many slides and animations are in your presentation, get a trial of iSpring River, the number one option on our list.
How to convert OpenDocument Presentation to Video in OpenOffice
 ]
]
OpenDocument Presentations are the presentation files with the .odp extension created with Apache OpenOffice Impress application. Now, if you are one of those wondering how you can convert an ODP file to a playable video file in OpenOffice, this article is your stop. Although you don’t have any direct option in OpenOffice to do so, I am going to share a trick in order to convert an ODP presentation to a video file.
You can convert OpenDocument presentation to video in Apache OpenOffice Impress software. But, as it doesn’t provide any native function to perform the conversion, you will have to use an extension. Let’s check out the extension and conversion steps in detail.
Convert OpenDocument Presentation to Video
The basic steps to convert ODP to video include:
Download and install Apache OpenOffice. Add an additional extension to OpenOffice. Open and convert ODP to video in OpenOffice Impress.
Let’s elaborate on these steps!
Firstly, download Apache OpenOffice and install it on your PC.
Now, the extension that you need to export OpenDocument presentations to video is called Impress video converter. Using this extension, you can convert OpenDocument Presentation to an AVI video file. This extension can be downloaded from openoffice.org. After downloading this video presentation converter extension for OpenOffice, you can add it to the software by following below steps:
Launch OpenOffice Impress and go to the Tools menu and click on the Extension Manager option.
menu and click on the option. Next, click on the Add button and provide the path to the .oxt extension file that you downloaded.
Finally, press the Accept option and this presentation to video converter extension will be added to OpenOffice Impress.
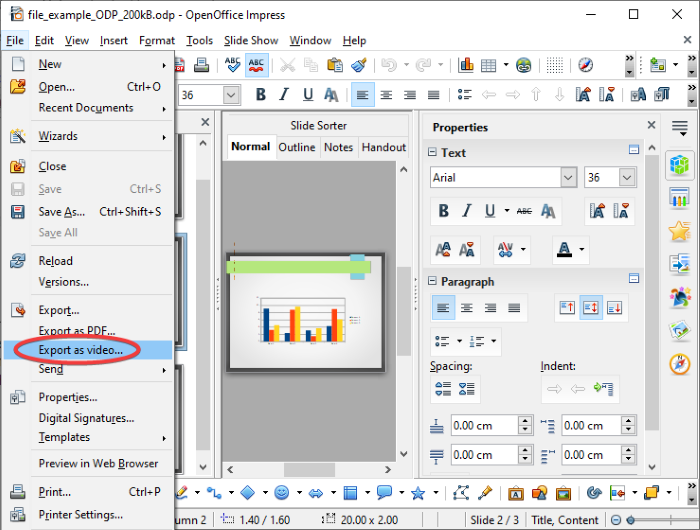
When done installing the extension in OpenOffice, restart the OpenOffice Impress application. Simply click on the File > Open option and import an ODP presentation file to it. You can edit the presentation if you want as it provides a lot of nice presentation designing features.
After that, go to the File menu and you will see a new option called Export as Video added to it. Click on this option and it will prompt an Export as AVI dialog window.
You now need to enter the number of seconds for the duration of each presentation slide in the output video and provide the output file location and name.
Lastly, tap on the Execute button and it will convert the imported ODP file to AVI video. You can now play, present, and share the OpenDocument presentation video as required.
Hopefully, this tutorial was helpful for you to find a solution to convert an ODP presentation to a video file in OpenOffice. In a similar manner, you can also convert Microsoft PowerPoint presentations (PPT, PPTX) to videos in OpenOffice using the same extension.
線上諮詢
與我們合作,馬上展開全新的創作里程碑
- 📅 立即預約,30 秒完成!
- 🎯 與創辦人 1 對 1 交流,獲得專屬建議! 🎯 與創辦人 1 對 1 交流!